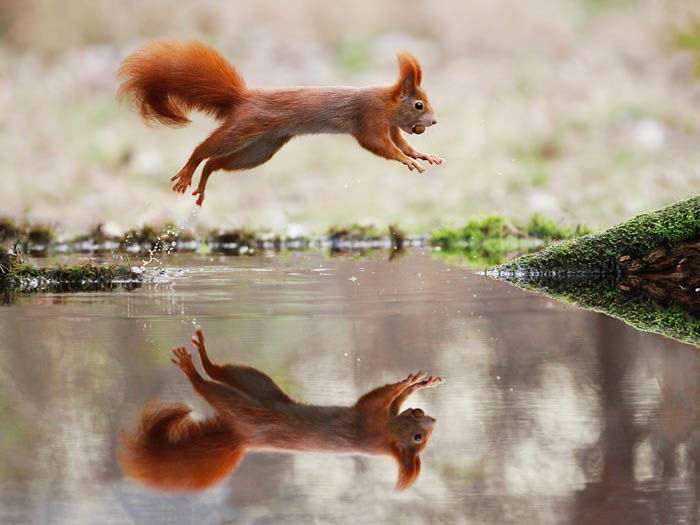
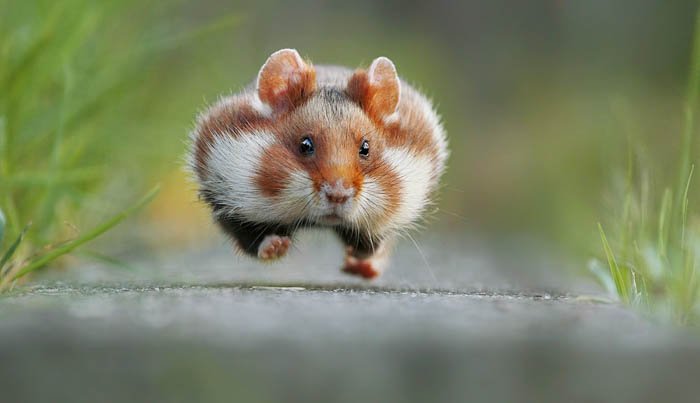
A jumping squirrel, a running hare, territorial fights between foxes – wild animals and their behaviour patterns offer tons of possibilities for great wildlife action photography.
Action-packed wildlife scenes are the most recognised ones, but even with an action shot of a mouse you could win the next nature photography competition.
This article will take you through the role your camera equipment plays, camera settings, and many other tips and tricks to capture that perfect moment.
Wildlife Action Photography: Studying the Animals
In order to take action shots of wild animals you have to find them first. It’s not as hard as you’d think. If you take a walk through the local forest, you’ll be surprised by how many different animal species you can find.
Another great way to find wild animals is to go to the nearest public park. Wild animals in public parks are usually less timid since they are used to humans.
Songbirds are especially easy to find in parks. Grab some sunflower seeds or homemade fat balls, and you can easily get them to come close to you.
What you need to keep in mind for when you encounter an animal species you haven’t photographed before, is to observe them. Try to figure out their habits and if there’s any pattern to their behaviour.
I’ve been a wildlife photographer for almost seven years now and what I have learnt for sure is that all animals have different characteristics. Some are extremely timid, while others get used to the presence of humans much faster. Knowing this is extremely important for when you want to photograph them.
The more time you spend observing a particular animal species, the better you can empathize with them. You might even start to predict their behaviour, and plan your shots in advance.
If you try to photograph timid animals, don’t forget to wear camouflage clothes or even a camouflage tent. This will help you disguise yourself when approaching animals and not scare them off.
Camera Settings for Wildlife Action Photography
The key to breathtaking action pictures of wild animals is to set the right camera settings before everything happens. Once things get going, you won’t have to think about settings and will be able to fully concentrate on what is happening in front of you.
Keep in mind the exposure triangle. This consists of following: Aperture, Shutter Speed and ISO. Finding the right combination of these three elements will help you capture action wildlife shots perfectly.
And here’s how to find it.
Shutter Speed
For wildlife action photography, shutter speed is probably the most important element out of the exposure triangle. Taking action-loaded wildlife scenes with a slow shutter speed will never work.
Setting a fast shutter speed is always necessary in order to freeze the animals during that right moment. If the shutter speed isn’t fast enough you might end up with blurry images.
It always depends on the movement’s intensity, but I would recommend setting the shutter speed to at least 1/500. In most situations you might need a much faster shutter speed though.
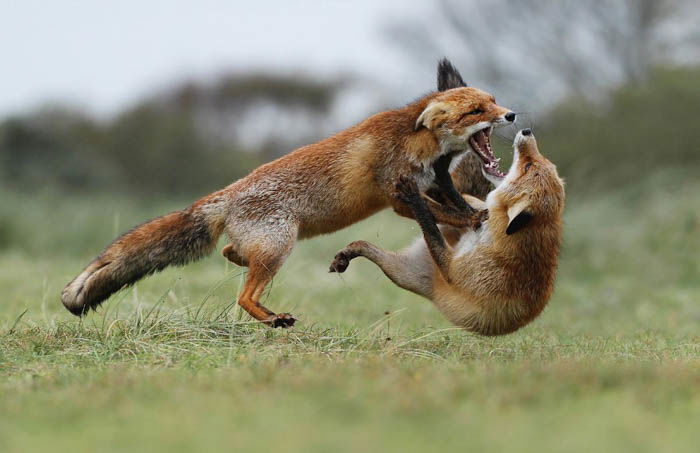
The territorial fight between the two foxes shown in the image below was taken at a shutter speed of 1/5000. If I had set the shutter speed to 1/500, the image would have been blurry.
It’s always better to be safe than sorry, so use the fastest shutter speed possible.
Aperture
Another great way to set a fast shutter speed is to take images with an open aperture. Compared to standard aperture lenses, fast aperture lenses are able to collect much more light. This will allow you to set a fast shutter speed.
Furthermore, using a wide aperture lens will help you get a super soft and blurry background. It will also isolate the subject of your pictures from its surroundings.
Keep in mind that you will have a narrow depth of field when shooting with a narrow aperture.
The higher your aperture value, the slower your shutter speed will need to be, and the busier the background will be. Ideally, you should always try to keep your aperture to a value that enables a fast enough shutter speed to capture action scenes without motion blur.
For wildlife action photography I would recommend always using an aperture between f/2.8 and f/5.6.
ISO
Fast shutter speeds have the disadvantage of allowing less light to get to the camera’s sensor. In order to compensate for that, increase the ISO value. Be aware, however, that a high ISO value can lead to grain in your images.
If there is enough light, you’ll want to set your ISO to the lowest value possible – this can be 100 or 200.
If the light is really bad, you’ll have to select a high ISO value. The good thing about modern cameras is that they are able to shoot at a higher ISO values (up to 3600), without having much grain or noise in the image. This is especially true for modern full frame cameras that offer really brilliant ISO performance.
When it comes to wildlife photography, experiment a bit with ISO settings to figure out your camera’s limits. Keep in mind that good image quality is quite important for the overall impression of your photograph.
If there is a lot of noise in your image, you can always reduce it while post processing your image in Photoshop.
Continuous Shooting Mode
Using continuous shooting speed is another important thing when you try to capture a wildlife action scene. With continuous shooting mode, you will be able to capture every second of your scene.
Most cameras offer two different shooting modes – single frame shooting mode and continuous shooting mode. When selecting single frame shooting mode, you are able to take a single image whenever you press the shutter button. This mode is mainly used for portrait, architecture or landscape photography.
Continuous shooting mode allows you to take a series of shots as long as you press down the shutter button. This is perfect for wildlife action photography. After capturing an action scene, you can simply select the best image.
If you’re using a camera that offers many images per second, you’ll increase your chances of capturing that perfect shot. Or more than one, as you’ll have many images to choose from.
Modern cameras can shoot up to 14 images per second. I would recommend choosing a camera that can provide at least 8 frames per second to get the most out of a wildlife action sequence.
For example the Canon EOS-1D X Mark II is able to shoot 14 frames per second. This is extremely fast, making it one of the best cameras on the market right now for action photography.
ExpertPhotography recommends: Canon EOS-1D X Mark II
Image Stabilization
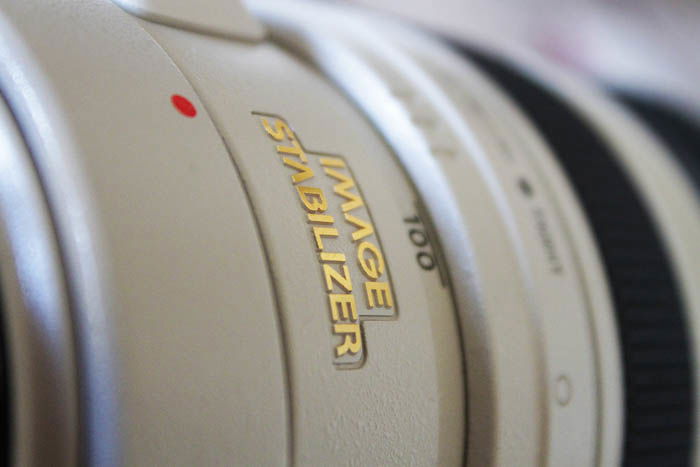
Camera shake can cause blurry images. There is almost nothing that will ruin an image worse than an unwanted blur or lack of sharpness. This is where the image stabilization system comes into play to help produce shake-free images.
If you primarily use your camera handheld and if your camera lens is equipped with an image stabilization system, I would recommend activating it whenever you try to get action wildlife shots.
The image stabiliser will also be useful if you’re photographing with a slow shutter speed or under bad light conditions. It will give your pictures more clarity and improve their overall quality.
Keep in mind though that you shouldn’t turn on the image stabiliser when your camera is mounted on a tripod. This will create a type of feedback loop that will cause more blurriness than sharpness.
Also, the stabilization system will use up your camera’s battery faster so don’t keep it on when you don’t need to.
Continuous Focus Mode
Your choice in auto focus mode plays an important role when you want to capture wildlife action shots. Most SLR cameras usually have 2 different auto-focus modes: One-Shot/AF-S mode or Al Servo/AF-C mode.
I would strongly recommend selecting the continuous focus mode for when you want to photograph animals in action.
If you want to activate the continuous focus mode you just need to press your shutter button halfway down. When you are ready to take the shot, press your camera shutter button down fully.
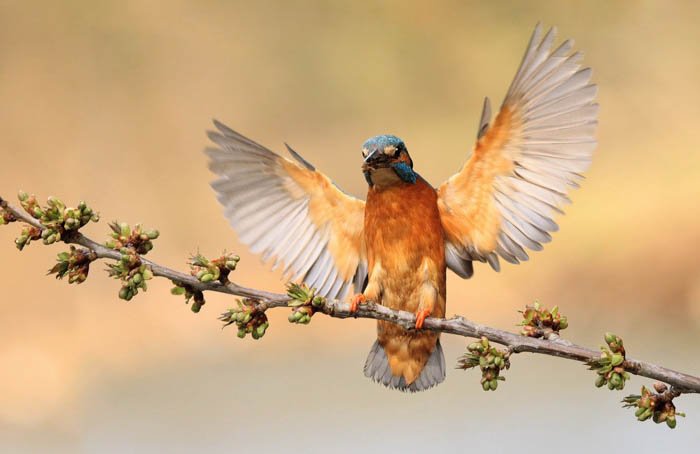
For example, if you want to photograph a bird flying towards to you, the camera focus will stay on the bird as long as you hold the shutter button halfway down. This means that your camera’s focus will always follow and re-focus the bird constantly.
This is a brilliant tool to use in action shots. It will make your life easier and you’ll be surprised by how simple getting everything in focus will be.
So, for successful wildlife action photography, you should:
- keep the ISO as low as possible
- set the Shutter Speed as fast as possible
- and have the aperture as wide as possible

Best Camera Lenses for Wildlife Action Photography
There are several brilliant and high quality fast aperture telephoto lenses with amazing performance when it comes to wildlife photography. The problem for a lot of us is that they are usually the most expensive lenses you can find on the market.
For example, the Canon EF 300mm 2.8 L IS II USM costs about $6,000 and the Canon EF 400mm 2.8 L IS II USM will even set you back $10,000.
ExpertPhotography recommends: Canon EF 300mm 2.8 L IS II USM
ExpertPhotography recommends: Canon EF 400mm 2.8 L IS II USM
Unfortunately, if you want to photograph action shots of wild animals, there’s no way around this. There are a few more “affordable” fast aperture lenses on the market, though, so you don’t have to go for the higher end options.
The Sigma 120-300mm F2.8 Sports DG APO OS HSM, which I personally own and would definitely recommend, is only about $3,600. It has everything you would need for wildlife action photography – a fast aperture of f2.8, a very quick autofocus and brilliant overall quality.
ExpertPhotography recommends: Sigma 120-300mm F2.8 Sports DG APO OS HSM
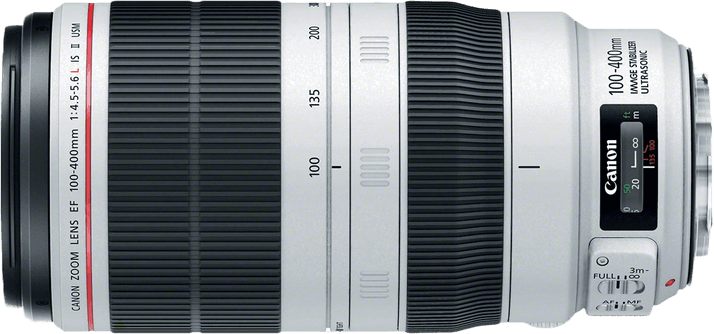
I also use the Canon EF 100-400mm f/4.5-5.6 L IS USM quite often for action shots. This costs about $2,000 and has a really great focal length range.
ExpertPhotography recommends: Canon EF 100-400mm f/4.5-5.6 L IS USM
How much you’re willing and able to invest in camera equipment is always a matter of personal choice and circumstance. When it comes to wildlife action photography, the investment is worth it. The results from a high end camera lens are significantly different from what you can achieve with any other lens.
You can also purchase used lenses to save money. That’s what I do when I fall in love with a lens that is beyond my budget. When you buy second hand lenses, you need to always buy them from a trustworthy source with a ranking and feedback system.
Always check the functional condition upon purchase to be sure that everything is okay. The easiest way to check is to just do a quick test to see if the autofocus works how it should and if there aren’t any potential problems with the lens.
More lenses I would recommend for wildlife action photography:
Canon EF 100-400mm f/4.5-5.6 L IS USM
Canon EF 300mm 2.8 L IS II USM
Sigma Sports AF 500mm 4.0 DG OS HSM
Sigma AF 300mm 2.8 EX DG APO HSM IF
Sigma 120-300mm F2.8 Sports DG APO OS HSM
Canon EF 200-400mm 4.0 L IS USM Extender 1.4x
Canon EF 400mm 4.0 DO IS II USM
Best Accessories for Action Wildlife Photography
Camouflage Tent
A camouflage tent allows you to get close to the wild animals. This is especially necessary if you want to photograph timid or skittish animals. As far as I’m concerned, it’s a must have accessory for every wildlife photographer.
Wild animals will feel much safer and be less suspicious if you photograph them out of a tent. These tents are also usually waterproof, so you can take images under any kind of .
Camouflage tents usually come in a bag and are easy to set up. Depending on the size, camouflage tents can be purchased for 50$-200$.
If you are looking for a stable and high quality hide tent, then I would recommend the AW Portable 1-2 Person Pop Up Hunting Blind Tent 300D. It only takes about two or three minutes to set up.
ExpertPhotography recommends: AW Portable 1-2 Person Pop Up Hunting Blind Tent 300D
The tent has enough place for two people and other accessories like a heater, a camping chair, a tripod, etc. It only costs about $65 and is worth every cent!
Another really great camouflage tent that I personally own is the Walimex Pop-Up Camouflage Tent. It costs about $100 but is definitely worth the price.
ExpertPhotography recommends: Camouflage Tent
Tripod
Hand holding cameras with a telephoto lens attached is just not the best option when shooting wild animals in action. Tele lenses are usually very heavy, massive and cumbersome. Using a tripod is essential sometimes, and both your back and your photography will be better for it.
If possible always try out the tripod that you are going to buy. Many photography stores offer the option to hire equipment. This gives you the chance to try out the tripod with your camera and make sure it’s the right fit.
Tripods for light-weight equipment
There are quite a few tripods that are worth investing in if you use light weight camera equipment. I have been using the Hama Traveller 163 tripod for many years now.
I mainly use the Canon EF 100-400mm f/4.5-5.6 L IS USM tele lens and the Hama tripod has absolutely no problems carrying the weight of my camera and lens. This tripod is also the perfect solution for low-budget photographers as it only costs around $120.
ExpertPhotography recommends: Hama Traveller 163
Tripods for heavy-weight equipment
If you’re working with bigger lenses, like the Sigma 120-300mm F2.8 Sports DG APO OS HSM, which weights nearly 10 lbs, you have to make sure your tripod can hold all the weight. A tripod I would definitely recommend is the Gitzo lightweight Traveler Series 1 Carbon Fiber.
It has strong but light carbon fiber legs and supports up to 10 kilos of camera weight. That makes it excellent for working out in the field, photographing wildlife, without worrying your tripod is going to break under your camera’s weight.
The carbon fiber will also be more comfortable for you if you’re walking long distances to find the wild animals. It’s lighter than aluminum, and has the ability to absorb small vibrations going through the tripod. This makes it great at preventing blurry images.
Carbon fiber tripods are also much more comfortable to use in cold weather conditions. They’re not affected by low temperatures the same way that aluminum ones are.
When it comes to tripods for wildlife photography, I would definitely suggest investing in a quality tripod that is light enough to carry and strong enough to hold all your camera equipment. You won’t regret the investment.

Memory Card
If you’re shooting in RAW, you should use a memory card of at least 64GB. RAW files are much bigger than JPEG, and need more space on your memory card. I would recommend shooting in RAW for wildlife action photography. If you’re shooting in JPEG, you have to deal with image quality loss and less options in post-processing.
When taking wildlife action shots, you will mostly use the continuous shooting mode. Your memory card must have a writing speed of at least 30MB per second.
The more photos you take, the more images you have to choose from and the higher the chances one of them will be an eye-catching action wildlife image. Also, try to always bring along as many memory cards as possible just to be on the safe side.
I personally use and would recommend the SanDisk Extreme Pro 32GB SDHC UHS-I Card. It has a writing speed of 90MB per second, and it it is perfect for wildlife action photography. It costs only about $20 and comes with SanDisk’s lifetime limited warranty, which is a nice extra.
ExpertPhotography recommends: SanDisk Extreme Pro 32GB SDHC UHS-I
Always Be At The Animal’s Eye Level
Most animals that I have photographed were much shorter or smaller than me. In order to capture their fascinating worlds, I’ve had to go down to their level.
Not being at the same height as them can also make your background much busier. Grass, trees or the ground immediately behind the animal can easily become a distraction from the animal itself.
When you go down to the animal’s eye level, however, you will get a much nicer background. It will usually appear more far away, and the focus will be on the animal you’re photographing. This also allows the viewer to connect better with the animals.
So be ready to get dirty and lay down flat on the ground to capture the most interesting perspectives!
Conclusion
Taking images of wild animals is a beautiful passion to follow and it is not always as difficult as it seems. Photography is a learning-by-doing process, the more time you spend taking images outdoors, the better you will get.
This article has shown you what the right equipment and needed preparation for wildlife action photography are. Now go out there, and take some pictures!