
Mar 19 2015
Rolleiflex TLR Focus Knob Hack for E & F Metered Models
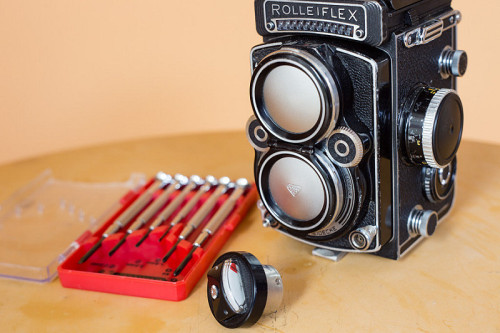
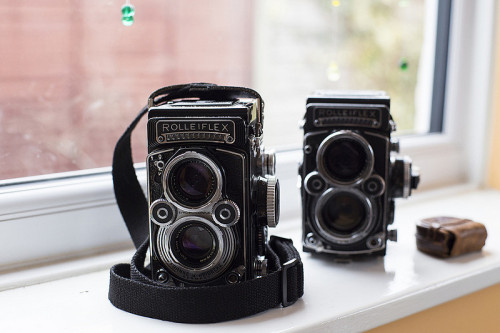
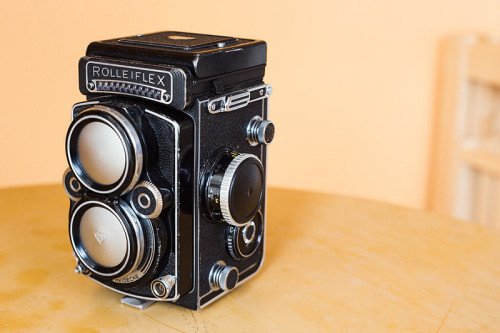
I shoot Rolleiflex twin lens reflex cameras with great dedication. The feel of the camera, the manner of composing a photograph, the brilliant engineering inside and out, all help to make it one of my favorite cameras.
From 1956, with the introduction of the “E” model, the twin lens cameras were sold with a selenium-celled, match-needle light meter installed in the end of the focus knob. My first Rolleiflex was the 3.5F, and I was thrilled to discover that the meter actually worked quite well for most daytime light readings and often even echoed the exposure decisions I had made using my spot meter.
All the same, I do prefer the spot meter for its precision, so for as much as I loved and used the camera, the meter, itself, was just taking up valuable space. Whether functional or non-functional, the presence of the light meter graces the camera with about 3/8 inch of excess Bakelite and circuitry beyond the end of the focus knob, and, as funny as it might sound, that extra 3/8 inch can make itself a nuisance inside my camera bag. It wasn’t long before I started to consider, “What if it wasn’t there?”
OK, sure, it’s really not a big issue, and, besides, the focus knob already juts outward for 5/8 of an inch. But, then again, why build even further outward to a full inch of obstruction if you don’t need to? Well, I was determined. I was going to figure out how to remove the light meter. And, it turns out, that was not the difficult part. The feat would be figuring out how to cover the gaping hole that was left once the light meter was removed.
Since the light meter was an optional feature on the Rolleiflex from 1958, there necessarily had been unmetered models, so, first, I did some shopping to see what spare parts I could locate. Almost nothing, as it turns out. I learned that the end covering for a focus knob of an unmetered Rolleiflex E/F is somewhat of a precious commodity. Using my Beginner’s Luck, I located one on eBay immediately, and this certainly pure coincidence, because I’ve never seen one on eBay, or anywhere else, ever since. My service center, when asked, said that it is a spare which they almost never have in their stock of parts. The rare specimen that I had found ended up selling to someone else for about £75. Safe to say, that was well more than what I had imagined putting into this venture.
An indeterminate time later, I was still scouring the internet, the house, the hardware stores, anything I could think of for alternative solutions. One by one, ideas were formed, and ideas were shot down. This one is to flimsy, this one might be toxic, at least to the film. Nothing of which I could conceive could best the practical realities of regular use, and the internet, for once, was proving little help. Surely there must be one other Rolleiflex enthusiast out there, somewhere, who had dreamed of reclaiming that 3/8 inch of bag-space from their camera, and surely this one industrious person from that undoubtedly already small demographic had already actually devised a work-around, thereby saving me the trouble of having to do it myself! Surely.
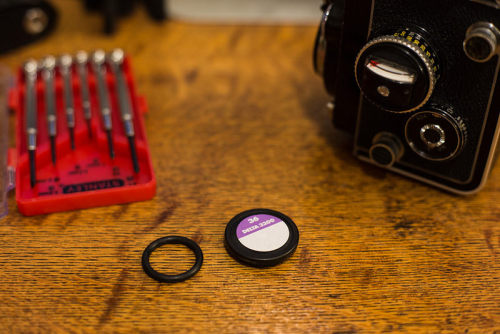
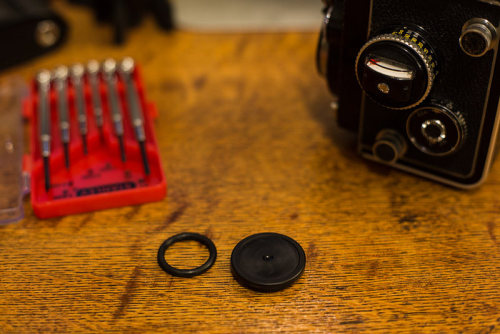
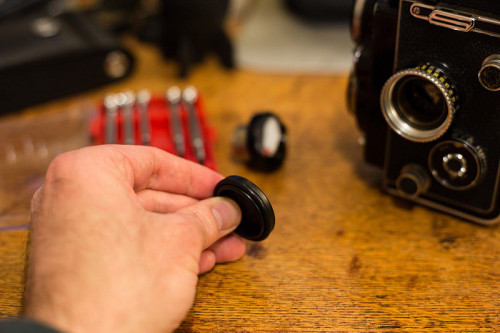
In the end, the answer smacked me in the face as almost obvious. Kind of poetic, in a way. And inexpensive. It’s a 35mm film canister lid. I know, right? Who knew. Still missing, though, was a dependable means to attach it. Several people in this forum had thought film canister lids sounded promising, but the only trial experience that I might concede to have been a success (albeit quite a permanent one) unfortunately involved glue.
As I was brainstorming one night, my brilliant wife remembered my having used a thin slice of rubber O-ring as a home-made fix on another of my cameras (perhaps worthy of a writing down at a later date), and she posed that I could use one to solve this Rolleiflex problem (at least I don’t think she used the word ‘obsession’) of mine. I recognized that it could work, but only if it were paired with a specific 35mm film canister lid.
Ilford film canisters have a notably peculiar design. Like any of the canister lids I tried, they are just almost the right size to fill the opening in the focus knob once the meter is removed. Unlike other film canister lids, though, they have a heavy lip under the top surface which exerts outward pressure on the inside rim of the film canister when pressed into place, and this works to hold them closed. This lip was the exact depth necessary to support an O-ring stretched around its circumference while providing just the right amount of extra, compressible material required to fill the gap between the outer edge of the lid and the inner surface of the focus knob. It’s a gasket, really.
Here is what you will need:
1 Rolleiflex E or F metered camera**
1 Ilford film canister lid
1 Rubber O-ring, 1 1/8 inches in diameter (cross-section diameter is approx. 1/8 inch)
1 Tiny slot-head screwdriver
And that is everything.
** The Rolleiflex T also had an optional, battery-powered meter for installation in the focus knob. From what I’ve seen, I think this plan might work for the T, as well as an E or an F, but I don’t have one to try, so I cannot say for sure.
And now, on to the hack:
Remove any labels from your film cap. Or not. What do I care? It’s your camera.
Now comes the most stressful part: taking a screwdriver to your precious camera. “But I’m not a licensed technician! What if I break it?!?” Well, if you were not the sort of child who took their toys apart to see how they worked (or if they always went back together with left-over parts) then maybe you’ll want to sit this one out. Or just keep reading before you attempt it. You may get over your fears once you see exactly with what you are dealing.

To remove the light meter, loosen the two tiny screws (hence the size of the screwdriver), one on either side, just below the meter’s dial. In my light meters, both from F-model cameras, the screws are fixed within the meter assembly making it impossible for them to go missing.
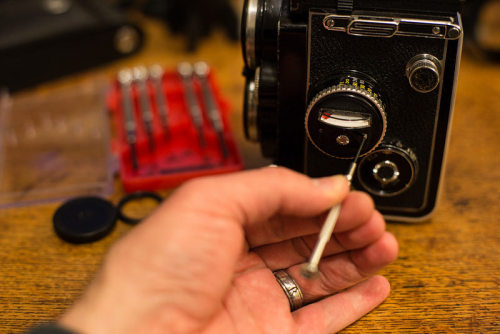
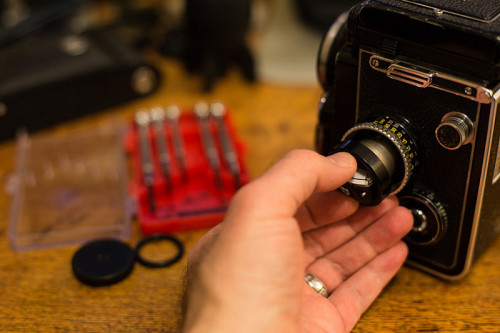
Don’t worry, the electrical connectivity is accomplished with metal contacts, so there are no wires to disconnect. The meter should now come away easily.

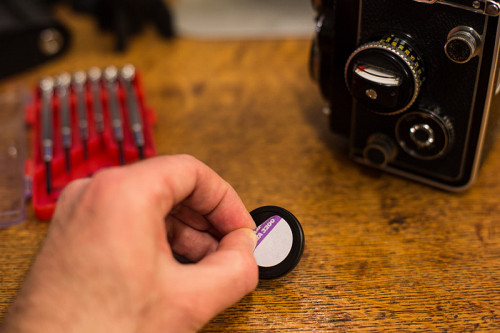
So, with that hurdle now out of the way, you are faced with the hole. And not to worry, because you’re actually almost done. Take your desired lid (I’ve used black ones from Ilford’s Delta 3200 canisters for both of my cameras) and stretch the O-ring around the lip on the underside of the cap.
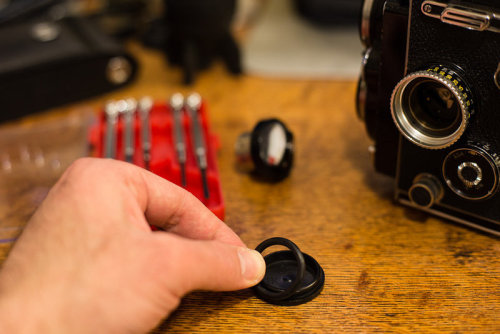
Place one end of the lid as far inside the focus knob as you can, hold that spot fixed with a thumb, then start working the lid and O-ring into the space while trying to hold in place as you go what you have already pushed inside.
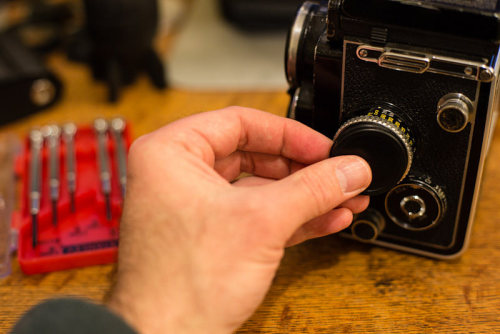
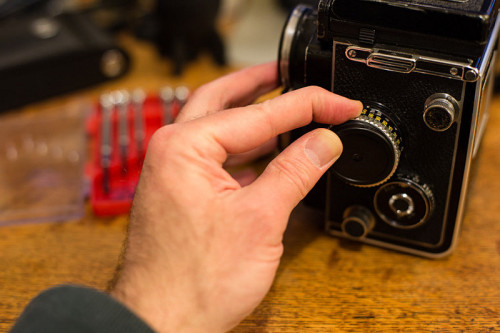
You will eventually compress the O-ring enough that it will give way and allow the lid to be pushed evenly into place. Once in, it should sit nearly flush to the edge of the knob and there should be no sign of the O-ring.
The results are a smooth, uniform surface that makes the focus knob look much like those on the more modern Rolleiflex FX and GX models (although lower-profile). At the same time, the O-ring has created a pretty effective weather-barrier. The whole process is reversible if you ever desire, because there were no bonding agents used, and it was far easier and sturdier than anything else that I had conceived. Since Ilford packages its film in canisters with either grey or black lids, there is even a nominal choice of color.
Incidentally, you will need to destroy your lid in order to remove it from the camera. The seal of the O-ring keeps the lid firmly in place by vacuum. I could see no way of removing it that did not involve cosmetic damage to the camera, so, in the end, I punctured the lid in the center, hooked a screwdriver inside, and pulled. That did the trick and was quite easy, but it also helped establish that each lid would only be good for a single use. Good thing that the central ingredient for this fix happens to be fairly abundant and always in need of some sort of recycling anyway.

